
Authentication Types
CX-Engine supports two OAuth 2.0 methods for authenticating your PBX connection:
| Method | Description |
|---|---|
| Authorization Code | The PBX redirects a user to CX-Engine to approve the connection interactively. This is the method used by the standard CRM template. |
| Client Credentials | Server-to-server authentication using only a client ID and secret. No user interaction or redirect required. |
The password grant is not supported for PBX integrations. Only Authorization Code and Client Credentials are available.
Use Authorization Code when using the standard XML template (the method described below). Use Client Credentials for automated or headless setups where no browser redirect is possible.
Connecting 3CX
Create an OAuth 2.0 Client
In the CX-Engine application, go to the API Clients menu and click Add Client.
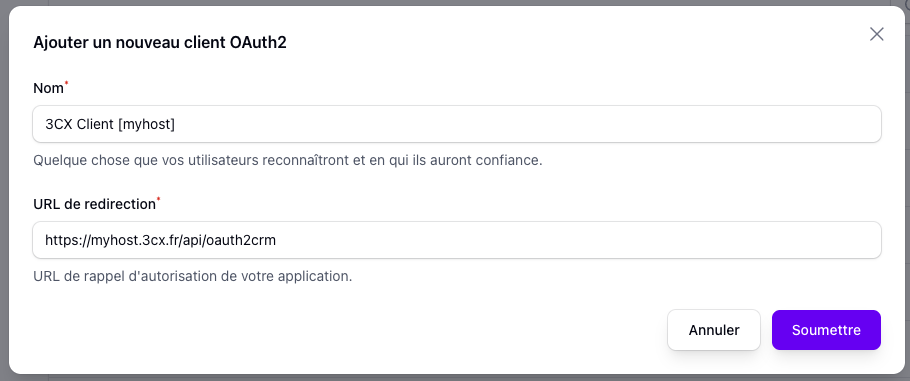
Keep note of the Client ID and Client Secret values — you will need to enter them in 3CX.
Import the CRM Template
From the advanced connector configuration page at CRM Connector > Settings, click the Download XML Template button in the top-right corner of the screen, then select your PBX system and submit.
The filename to be uploaded must not contain spaces or special characters. We recommend keeping the original filename: CXEngine.xml.
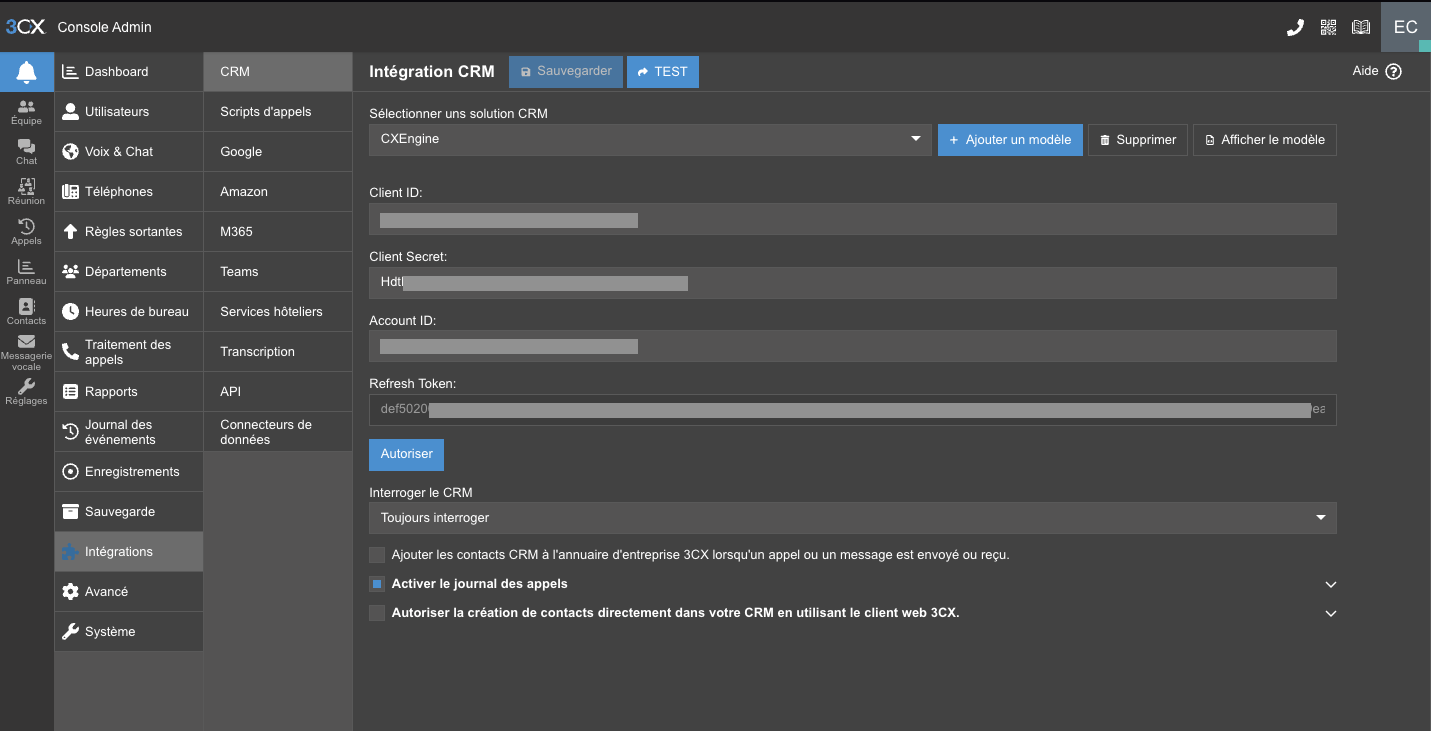
Once the CRM template file is on your machine, go to your 3CX instance under Admin > Integrations > CRM.
Upload the file using the Add Template button. Once the template is imported and selected, fill in the following values:
- Client ID: the Client ID previously generated in the CX-Engine interface
- Client Secret: the Client Secret previously generated in the CX-Engine interface
- Account ID: the CX-Engine client ID as shown in the interface, under the Clients section
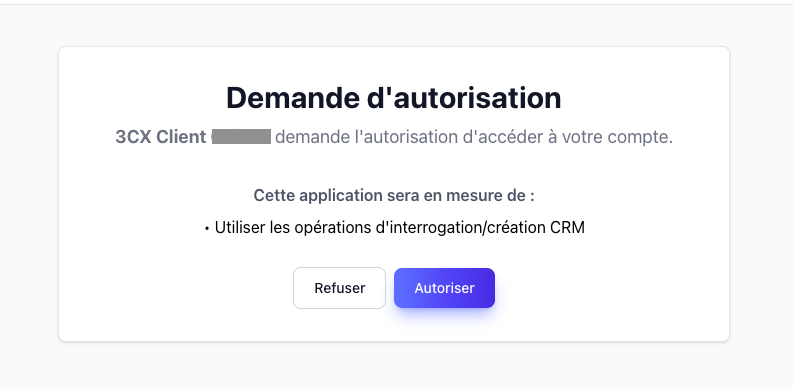
Save the settings, then click Authorize to authorize the connection in the CX-Engine interface:
After clicking Authorize, you will be automatically redirected to 3CX:
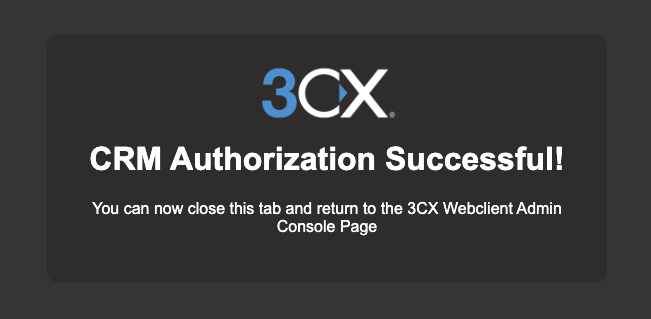
You can close this window and reload the integrations page in 3CX. Make sure to check the Enable call logging checkbox if applicable.
Important: If you run tests from this page using the test button, remember to click Authorize again to refresh the token before leaving the page. Otherwise, subsequent calls will not work (3CX does not save the fresh token after a test from this interface).